How to Connect Claude to Video Editing: A Practical Guide


In this article▾
Claude is one of the most capable AI assistants available today, and connecting it to video editing tools opens up workflows that were impossible just a year ago. Wireflow makes this connection straightforward by letting you chain AI models, including Claude, into automated video pipelines without writing code.
Why Connect Claude to Video Editing?
Video editing has always been time-intensive. Cutting footage, writing captions, generating thumbnails, and assembling final exports can consume hours of manual work per project. Claude can handle the text-heavy parts of this process: writing scripts, generating subtitle files, describing scenes for AI image generation, and orchestrating multi-step creative workflows. For a hands-on look, see the connect Claude to video editing feature page.
The real power comes when you connect Claude's language abilities to actual generation and editing tools through API pipelines. For agent setups, compare Wireflow's roundup of MCP tools for video.
Build this in Wireflow
Make the same kind of asset on a canvas you control, with a free account and no credit card.
Method 1: MCP (Model Context Protocol) Integrations
The most direct way to connect Claude to video editing is through MCP servers. MCP lets Claude interact with external tools as if they were native capabilities. Several video editors now support MCP connections, including dedicated tools built specifically for AI-driven video workflows.
Here is how MCP connections typically work:
- Install an MCP server that bridges Claude to your video editor
- Configure the connection in Claude Desktop or your Claude Code environment
- Claude gains the ability to read timeline data, suggest edits, and write changes back
For example, Premiere Pro plugins let Claude read your sequence and apply edits like cutting silences, adding captions, or reordering clips. The key advantage is that Claude understands context: you can say "remove every section where nobody is speaking" and it will identify and cut those segments based on the AI model chaining between speech detection and timeline manipulation.
Method 2: Node-Based Visual Pipelines
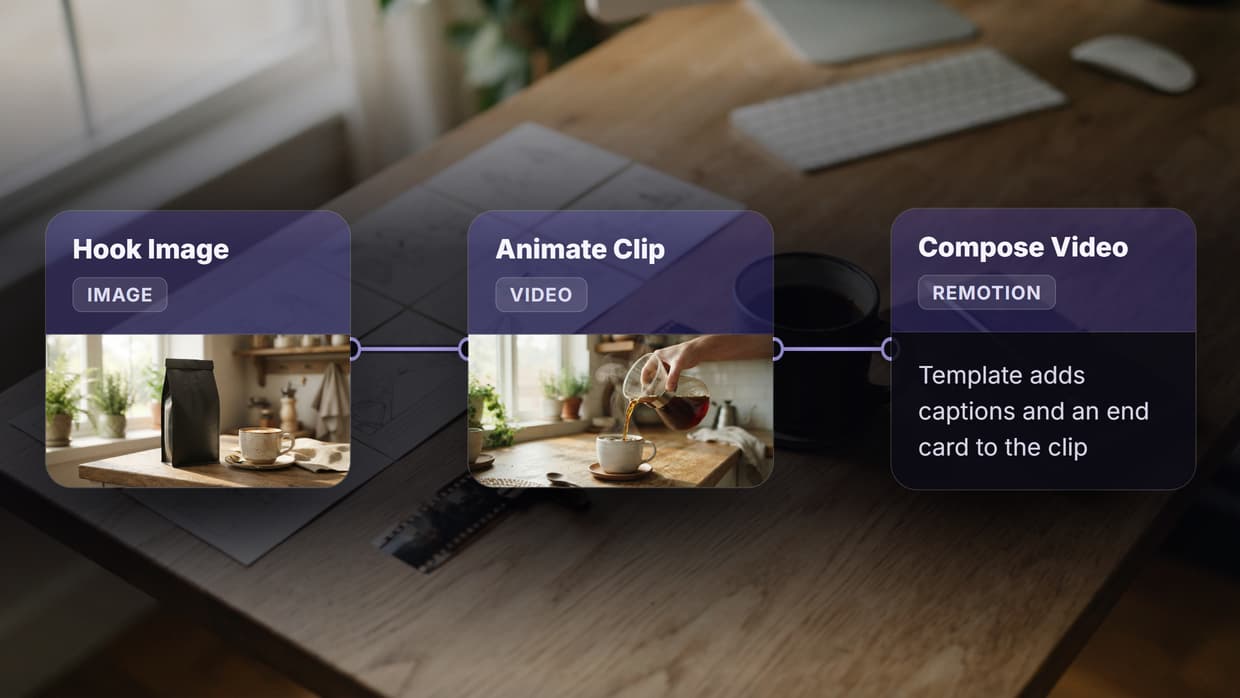
If you prefer a no-code approach, visual pipeline builders let you connect Claude's outputs to video generation models through drag-and-drop nodes. This works well for content creators who want repeatable creative workflow automations without managing API keys or writing scripts.

A typical pipeline looks like this:
- Input node: your text prompt or script
- Claude node: processes the prompt into structured scene descriptions, captions, or image prompts
- Image generation node: creates visuals from Claude's descriptions
- Video generation node: converts those images into animated clips
This approach works especially well for batch AI generation, where you need to produce multiple video assets from a single brief. You define the pipeline once, then feed it different prompts to generate variations. The same approach works for stills, as covered in our Claude Code image generation guide.
Method 3: API-First Automation
For developers and teams building production video systems, connecting Claude through REST APIs gives you the most control. You can call Claude's API to generate scripts or scene descriptions, then pipe those outputs into video generation endpoints. Platforms offering headless AI workflow capabilities let you run these pipelines server-side on a schedule or triggered by webhooks.
A practical API workflow might look like this:
- Send a brief to Claude's API, asking it to break a topic into 5 scenes with visual descriptions
- Pass each scene description to an image generation model
- Feed the generated images into an image-to-video model like Kling or Seedance
- Stitch the resulting clips together using a video assembly API
The entire process runs without manual intervention. You can schedule it daily, trigger it from a CMS publish event, or chain it into a larger AI content generation pipeline.

What Claude Can and Cannot Do in Video Editing
Understanding Claude's boundaries prevents frustration. Here is a clear breakdown:
Claude excels at:
- Writing video scripts and scene breakdowns
- Generating SRT/VTT subtitle files with precise timing
- Creating structured prompts for image and video generation models
- Orchestrating multi-step workflows through AI pipeline automation
- Analyzing transcripts to identify key moments, filler words, or topic transitions
- Writing video descriptions, tags, and metadata for SEO
Claude cannot:
- Directly render or preview video frames
- Perform pixel-level color grading or effects
- Process raw video files without an intermediary tool
- Replace frame-precise editing for complex cuts
The practical takeaway is that Claude serves as the brain of your video pipeline, handling planning, text generation, and orchestration, while specialized models handle the visual rendering. This division of labor is exactly what makes multi-model AI workflows effective.
Step-by-Step: Building Your First Claude Video Pipeline
Here is a concrete walkthrough to get started:
Step 1: Choose your connection method
For most creators, a visual node editor is the fastest path. For developers, the API route offers more flexibility. Both connect to the same underlying AI workflow builder infrastructure.
Step 2: Set up your input
Create a text input node with your video concept. Be specific: "A 30-second product demo showing a mobile app's onboarding flow" works better than "make a video about my app."
Step 3: Configure the AI models
Connect an image generation model (like GPT Image or Nano Banana) to create your visuals, then pipe those into a video model. Each node in the chain transforms the output of the previous one, following the no-code AI canvas approach.
Step 4: Add motion and audio
Use a dedicated motion prompt to control camera movement, transitions, and pacing in the video generation step. If you need voiceover, connect an AI voice generator node to produce narration from your script.

Step 5: Run and iterate
Execute the pipeline and review the output. The first run rarely produces a perfect result, but the pipeline structure means you only need to adjust the prompt, not rebuild the entire workflow. Save your pipeline as a reusable AI template so you can run it again with different inputs.
Try it yourself: Build this workflow in Wireflow. The nodes are pre-configured with the exact setup discussed above.
Frequently Asked Questions
Can Claude edit existing video files directly?
No. Claude is a text-based AI model and cannot process video frames. To edit existing footage, you need to pair Claude with a video editing tool through MCP or an API bridge. Claude handles the decision-making (what to cut, where to add captions), while the editing tool applies those changes to the actual video file.
What is the best way to connect Claude to Premiere Pro?
MCP plugins are currently the most reliable method. Tools like PremiereCopilot and AutoEdit provide MCP servers that let Claude read your Premiere Pro timeline and write edits back to it. Install the plugin, configure the MCP connection in Claude Desktop, and you can start giving natural-language editing instructions.
Is it possible to generate entire videos using only Claude?
Not with Claude alone, but by connecting Claude to image and video generation models, you can produce complete videos from a text prompt. Claude generates the scene descriptions, an image model creates the visuals, and a video model adds motion. This pipeline approach produces results that would otherwise require a human editor.
How much does it cost to run a Claude video editing pipeline?
Costs depend on which models you use. Claude API calls are relatively inexpensive for text processing. The video generation step is typically the most expensive, ranging from $0.05 to $0.50 per clip depending on the model and duration. Running a full pipeline for a 60-second video usually costs between $1 and $5 in total API fees.
Can I use Claude to add captions to my videos automatically?
Yes. Claude can generate SRT or VTT subtitle files from a transcript. You provide the transcript (or use a speech-to-text model first), and Claude formats it into properly timed caption segments. These files can then be imported into any standard video editor or burned into the video using a rendering tool.
Does Claude support real-time video editing?
Not yet. Current Claude integrations work in a request-response pattern, meaning you describe what you want and Claude processes the instruction. Real-time, frame-by-frame editing requires specialized software. However, for batch processing and automated pipelines, Claude's throughput is more than sufficient for most content production needs.
What video formats can Claude work with?
Claude itself does not process video files, so format compatibility depends on the tools you connect it to. Most API-based video generation models output MP4. If you are using MCP with Premiere Pro or similar editors, those tools handle format conversion. The pipeline approach makes format concerns largely irrelevant since each tool handles its own input/output standards.
Can I connect Claude to free video editing tools?
Yes. Several free and open-source editors support MCP connections or API integrations, and community-built MCP servers exist for tools like DaVinci Resolve and ffmpeg-based editing. You can also build and run simple video generation pipelines on a free tier without any upfront cost.

Co-Founder & Operations at Wireflow
Runs client operations and content strategy at Wireflow. Works directly with creative teams and agencies to build production AI workflows.
- Content Strategy
- Client Operations
Get unlimited ad creatives today.
One call to see if we are a fit and scope the first ad. If it fits, your first batch lands inside week one.