How to Create AI Portraits From Photos

In this article▾
How to Create AI Portraits From Photos
Creating AI portraits from photos comes down to three things: a clear source photo, a model that holds your face steady, and a prompt that describes the photograph you want rather than the person in it. This guide covers the full process, from choosing source images to fixing the generations that come out wrong. Wireflow runs those steps as one connected canvas, so a setup you tune once can be rerun whenever you need a fresh set.
When a portrait is close but the expression is off, an AI face editor fixes the smile, lighting, or hair from a written instruction while keeping the same person.
What you need before you start
You need less than most tutorials suggest. One well lit photo of your face is the minimum, a prompt that names the lighting and wardrobe, and a model that accepts an image as a reference instead of only text. With that same reference photo you can age a face forward or back, writing how many years to add or remove instead of accepting one fixed guess. For a hands-on look at this in action, the AI portrait generator feature page shows the same upload, generate and refine loop running end to end.
Three decisions shape everything that follows:
- How many source photos. One is enough for single-image identity transfer. Fifteen to twenty varied photos are needed to train a personal model you can reuse across hundreds of generations.
- What the portrait is for. A LinkedIn headshot and a fantasy avatar have very different tolerances for how far the face can drift, which is why a dedicated AI headshot generator constrains style far more than a general image model does.
- Where the output goes. Print needs a much larger file than a profile picture, and deciding this up front tells you whether an upscale pass belongs in the process.
Build this in Wireflow
Make the same kind of asset on a canvas you control, with a free account and no credit card.
Step by step: from source photo to finished portrait
Step 1: Pick a source photo the model can actually read
The single biggest quality lever is the input, not the prompt. Use a photo where your face fills a decent share of the frame, is evenly lit, is in focus, and is not obscured by sunglasses, a hat brim, a hand or a heavy shadow. Front-facing or slight three-quarter angles work best; extreme profiles give the model too little to work with. If your only usable photo is soft, clean it up before generating rather than after, because the guidance that produces professional AI headshots applies double to the input.
If you are training a personal model instead, gather fifteen to twenty photos across different days, outfits, backgrounds and lighting conditions. Variety is what stops the model from baking one particular shirt or one particular room into every result.
Step 2: Choose the right kind of model
There are two workable approaches and they suit different jobs.
| Approach | How it works | Best for | Trade-off |
|---|---|---|---|
| Single-image identity transfer | One reference photo conditions the generation through an identity adapter | Fast one-off portraits, style experiments | Likeness drifts more on unusual angles |
| Personal model training | 15 to 20 photos fine-tune a lightweight model of you | Consistent sets, ongoing use, brand photography | Setup time and a training cost per person |
Most people should start with single-image transfer. It returns results in seconds and tells you quickly whether the style you want is achievable at all. Recent image models such as Nano Banana 2 handle reference images natively, which removes the need to stitch separate adapters together for a first pass.
Identity transfer and face swapping are not the same operation. Transfer generates a new photograph conditioned on your face; AI face swap pastes a face onto an existing image. Swapping is the better choice when you already have the exact photo you want and only the face needs to change.
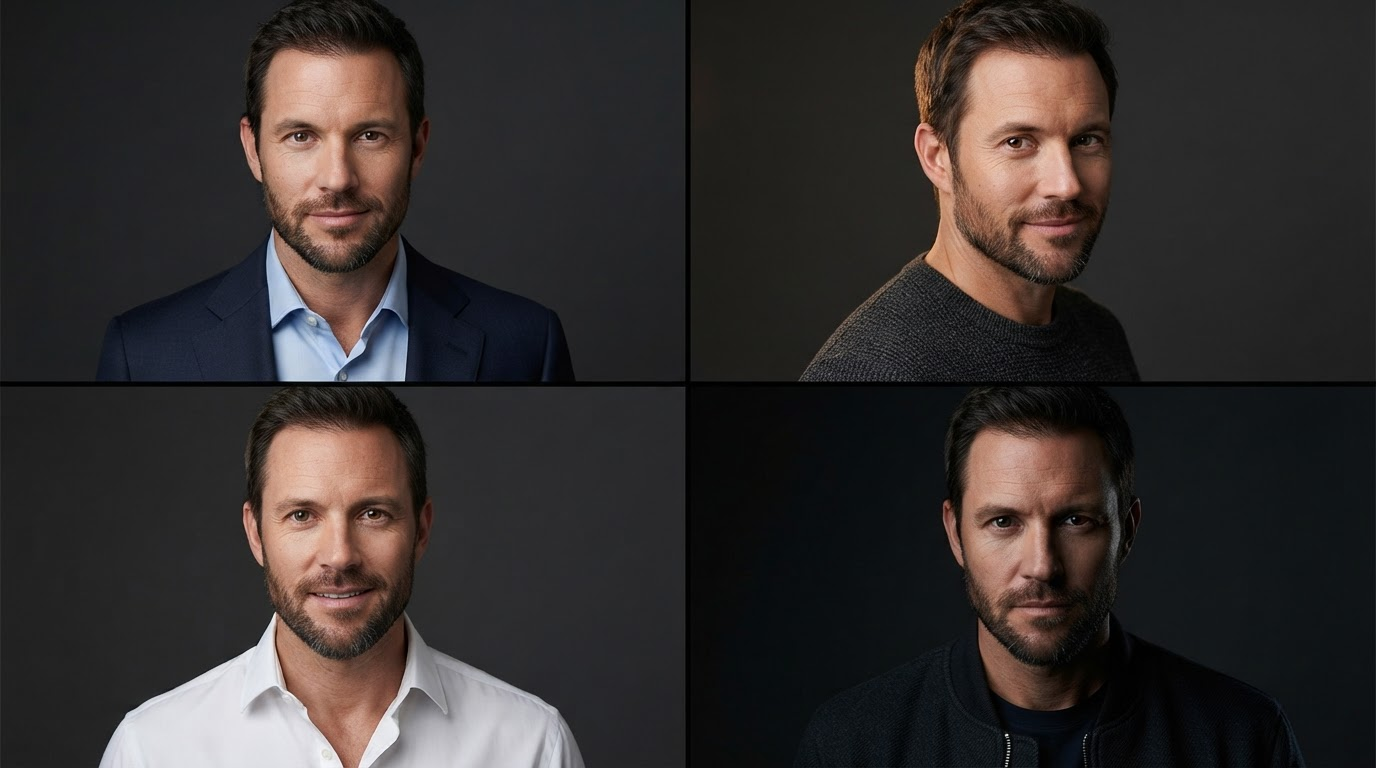
Step 3: Write a prompt that describes the photograph
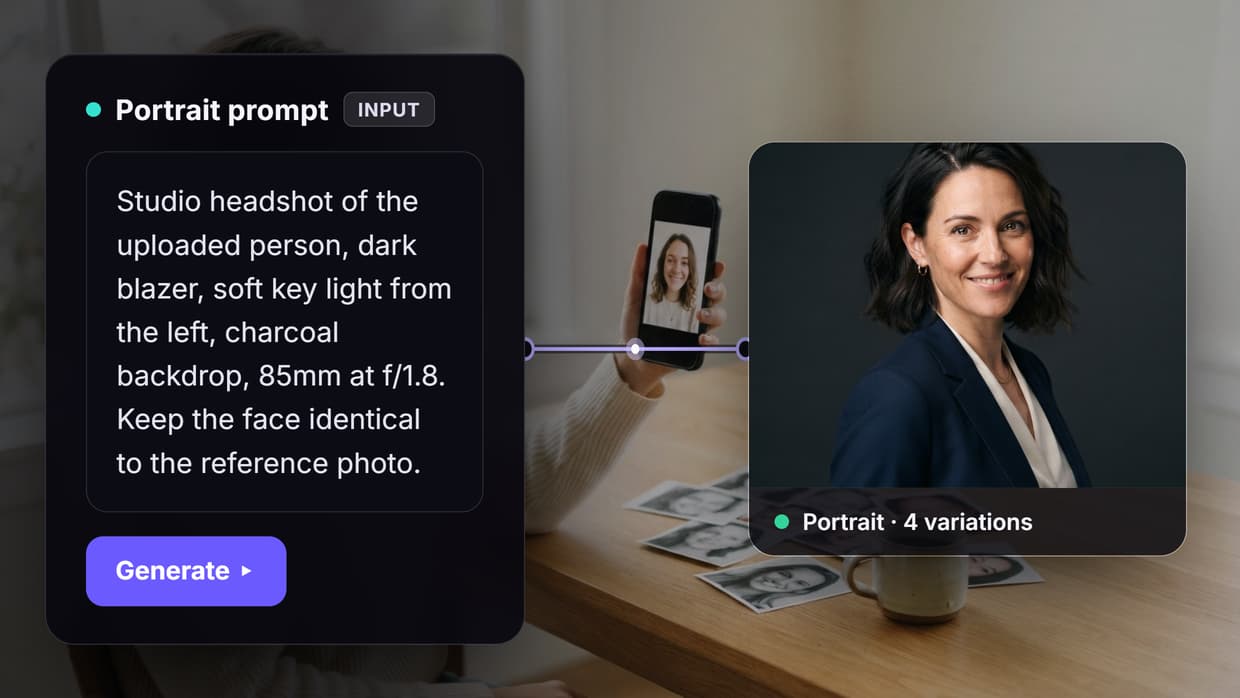
The most common prompting mistake is describing the person. The model already has the person, it took them from your reference photo. What it does not have is the photograph: the lens, the light, the backdrop, the wardrobe and the mood. A prompt that reads like a photographer's shot note beats one that reads like a physical description, and this holds across every serious AI image generator rather than being a quirk of one tool.
A reliable prompt formula has five slots:
- Shot type: studio headshot, half-length portrait, environmental portrait
- Wardrobe: dark blazer over a light shirt, grey knit sweater, open collar
- Lighting: soft key light from camera left with gentle fill, hard directional side light, window light
- Backdrop: plain charcoal studio paper, warm plaster wall, blurred office interior
- Camera: 85mm at f/1.8, natural skin texture, sharp catchlights
Put together: "Studio headshot, dark blazer over a light shirt, soft key light from camera left with a gentle rim light, plain charcoal backdrop, 85mm at f/1.8, natural skin texture." Add "keep the face identical to the reference photo" as a closing instruction when the model supports it.
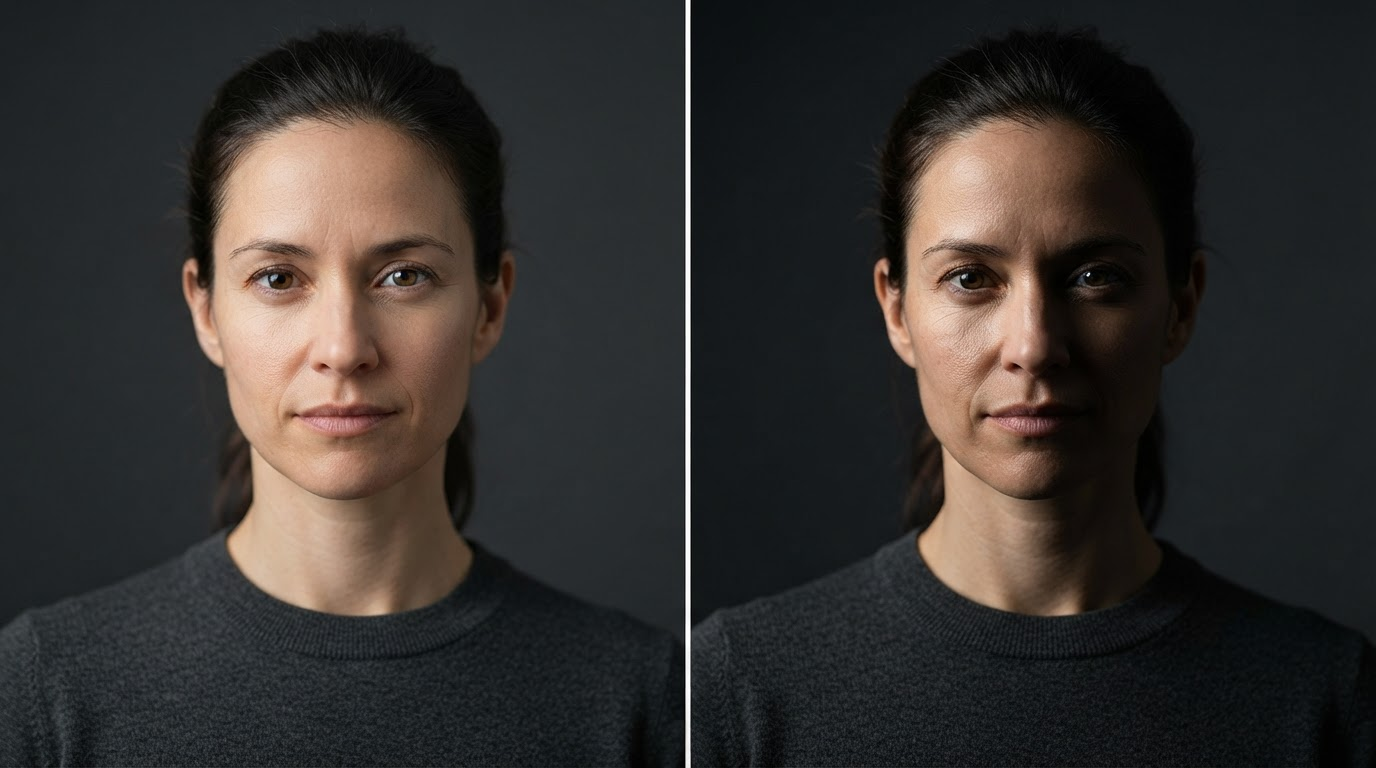
Step 4: Generate a batch, then judge
Never judge a setup on one image. Generate four to eight at a time and read the batch as a whole, because a single unlucky seed says nothing about whether the prompt works. When you get a keeper, hold the seed and change one variable at a time; that is how you build a matched set rather than eight unrelated pictures, and it is why any decent AI photo generator exposes a count control rather than a single generate button.
Judge on likeness first and aesthetics second. A beautiful portrait that does not look like you is a failed portrait. That same likeness-first bar applies when you de-age a portrait: the years come off, but the underlying identity has to stay obviously the same person.
Step 5: Fix the failures instead of rerolling them
Portrait generations fail in predictable places: hands, collars and lapels, teeth, glasses frames, earrings and hairlines. Rerolling the whole image to fix a warped button is wasteful when a targeted cleanup pass can repair the region and leave the rest untouched. An AI photo enhancer pass handles skin and detail recovery on results that are structurally right but soft.
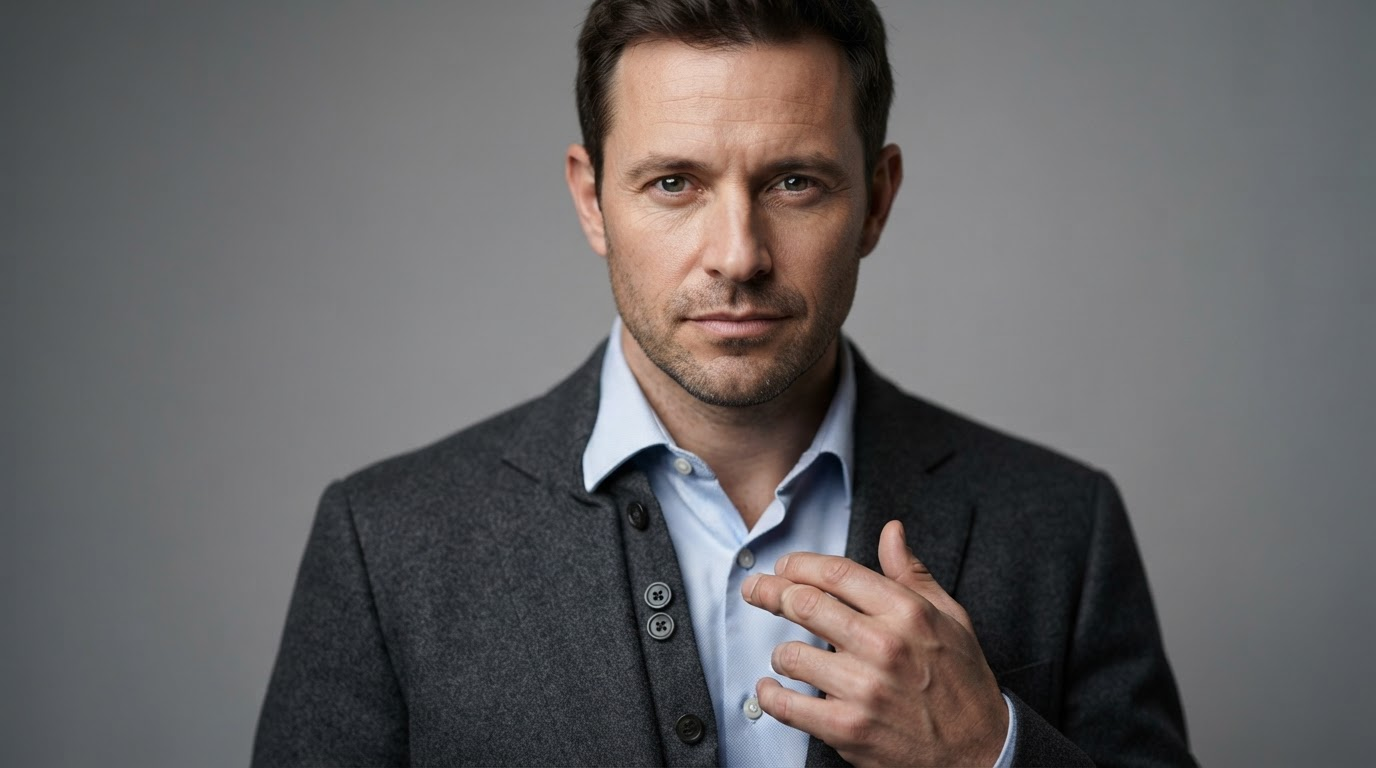
Watch specifically for the tells that mark an image as synthetic to a careful viewer: asymmetric earrings, a collar that melts into the jacket, glasses arms that do not reach the ears, and text on clothing that dissolves into shapes. These are what get a headshot flagged as AI generated, not the face itself.
Step 6: Upscale and export for the real destination
Most portrait models output around one megapixel, which is fine for a profile picture and thin for anything printed or displayed large. Run a final pass through an AI image upscaler to reach print resolution. If the source photo was soft to begin with, the techniques for sharpening blurry photos with AI will do more for the result than another round of generation.
Portrait styles worth generating
| Style | Prompt cues | Typical use |
|---|---|---|
| Corporate headshot | Neutral backdrop, soft even light, business wardrobe | LinkedIn, company site, speaker bios |
| Editorial | Hard directional light, deep shadows, textured backdrop | Press, interviews, author photos |
| Environmental | Blurred workplace interior, available light | About pages, case studies |
| Cinematic | Warm practical lights, shallow focus, film grain | Personal branding, social |
| Stylized | Illustration, anime, comic rendering | Avatars, gaming, community profiles |
Stylized output is more forgiving than photorealism because nobody expects a cartoon to be exact. The same source photo that produces a corporate headshot also feeds a cartoon avatar pipeline with nothing more than a prompt and model change.
Mistakes that cost the most time
- Fixing the input in post. A blurry, backlit or heavily filtered source photo cannot be rescued by a better prompt. Replace the input.
- Over-describing the face. Listing eye color and jawline fights the reference image and pushes the result toward a generic face.
- Changing five things at once. When four variables move between generations you learn nothing about which one mattered.
- Ignoring the background. A perfect face against a mismatched backdrop still reads as amateur, which is why changing photo backgrounds with AI is often the last fix a portrait needs.
- Skipping the rights question. Generating portraits of someone else from their photos without permission is a consent problem before it is a legal one.
Turning it into a repeatable process
Portrait work is rarely a one-off. A new hire needs a headshot in the same style as the rest of the team, a rebrand means regenerating a set, and a conference needs a speaker photo that matches last year's. Chaining upload, generation, cleanup and upscale into one saved graph means the second run costs a click instead of an afternoon, and an AI background remover slots into the same chain when the destination needs a cutout.
Try it yourself: Build this workflow in Wireflow, where the nodes are pre-configured with the reference-image and prompt setup described above.
FAQ
How many photos do I need to create AI portraits? One clear, well lit photo is enough for single-image identity transfer. Training a personal model that stays consistent across many generations takes fifteen to twenty varied photos.
Why does the AI portrait not look like me? Usually the source photo is the problem: too small in frame, too soft, poorly lit or shot at an extreme angle. The second most common cause is a prompt that describes facial features, which competes with the reference image. Both are fixable without changing models.
Can I create realistic AI portraits for free? Yes. Several models have free tiers that accept reference images, though they usually cap resolution and batch size. The trade-offs are covered in this comparison of free AI image generators, and the same limits apply when generating realistic AI faces for free.
Are AI portraits allowed on LinkedIn and other professional profiles? LinkedIn requires that your profile photo be a likeness of you, so an AI portrait generated from your own photos is generally acceptable while a fully invented face is not. Policies differ by platform, so check the specific terms before uploading.
What resolution should I export at? Around 1000 pixels on the long edge is fine for social profiles. For a website hero or anything printed, upscale to at least 2000 pixels on the long edge, and 300 DPI at the final print size for physical output.
How is an AI portrait different from an AI avatar? A portrait aims at a photograph that could plausibly have been taken by a camera. An avatar aims at a recognizable stylized representation, so likeness matters less than character. The process for creating AI avatars from photos shares the same first steps but diverges at the model and prompt stage.
Can I use AI portraits commercially? That depends on the terms of the tool and on whose face is in the image. Your own likeness generated on a plan that grants commercial rights is usually fine; someone else's face, or output from a free tier with a non-commercial clause, is not. Read the license before it goes on a billboard.
Conclusion
Good AI portraits are mostly a discipline problem rather than a technology one. Pick a source photo the model can read, describe the photograph rather than the person, generate in batches, fix defects instead of rerolling, and upscale for the destination. Doing those five things in order beats swapping between tools, and once the sequence is saved the next set takes minutes. If you are still deciding which model to build the chain around, this breakdown of AI image editors and photo tools is a reasonable next read.

Co-Founder & Operations at Wireflow
Runs client operations and content strategy at Wireflow. Works directly with creative teams and agencies to build production AI workflows.
- Content Strategy
- Client Operations
Make AI videos and ads.
Start free, no card needed.